How to Completely Recover Documents, Pictures and More Off Your Failing Hard Drive or SmartCard
Nearly every computer user has experienced a crash at one time or another. Most times your machine fires right back up, but sometimes not. So what do you do about all your pictures, music, videos and miscellaneous documents you’ve gathered over the years? Here are a few ways to save your precious data.
(BTW: this wouldn’t be necessary if you regularly backed up your files onto an external hard drive or or burned them onto DVD’s, but you probably haven’t done that).
Whoops! I Deleted Everything, Right?
If you’re a CSI, Law & Order or NCIS fan you’ve seen that data can be retrieved from a hard drive, even if it’s been deleted. That’s possible because even though you delete a file, it doesn’t actually go away. Your computer simply moves the file to an area of the drive where it can be overwritten and tells the OS (Operating System) that that space is now available.
But the TV Detective IT Squad has special tools to extract the damning digital evidence, right? Sure, but so do you and it’s free. Before I go there, what do you do when your hard drive completely dies and your computer won’t fire up? Honestly, most of the time it’s just a corrupted system file or portion of your boot sector which can be corrected by running the chkdsk command in a DOS command prompt, but that’s for another tutorial.
The most cost effective way to retrieve your data and even repair the drive is to open up the case, remove the hard drive and plug it into a another working computer as a slave drive.
A hard drive is a peripheral component and is not OS exclusive, however, in order to retrieve data from a Windows machine, you’ll need to hook the drive up to another Windows computer.
Remove the Failing Drive
- Power down the computer and unplug the AC from the back.
- Remove the side of the computer case.
- Locate the Hard drive and unplug the Power and Data cables from the back of the drive. (Newer computers use SATA connectors, but yours may have the PATA or Parallel connector, there are only two kinds so it’s one or the other)
- Unscrew or detach the drive from the chassis or case (check your manual for instructions) and remove the drive.
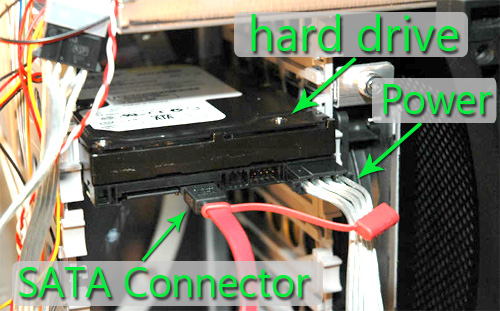
(The power cable pictured is a Moler cable, yours may be the SATA power connector, again there’s only two choices so it’s one or the other)
Most newer computer motherboards have both PATA and SATA connectors, check your hard drive connection and the motherboard connections of the computer you want to use to make sure.
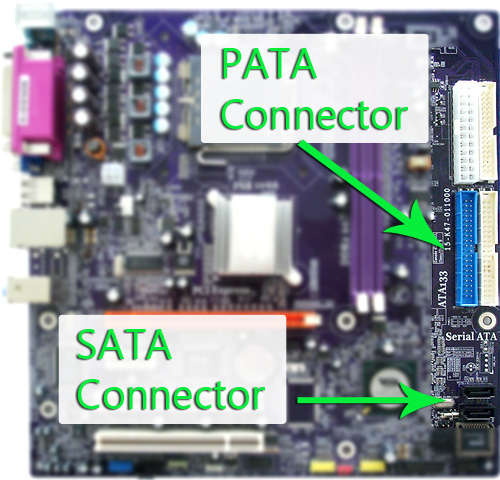
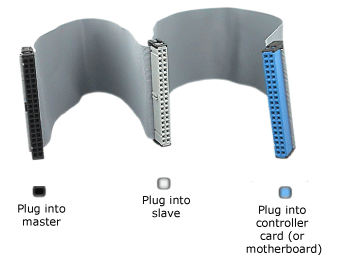
Next, be sure you have the proper cables. For the SATA drive you can pull the one from your computer and take it with you. If you have a PATA or Parallel connection you’ll need a PATA ribbon with three connectors like below:
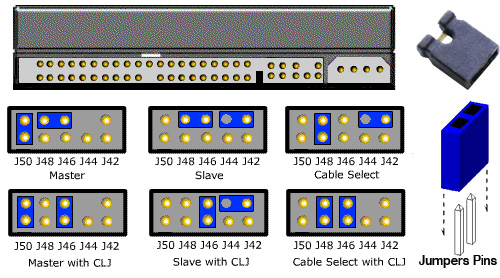
The only possible remaining issue could be the jumper pin settings on the PATA hard drive (SATA drives are preset). The most common jumper setting is CABLE SELECT (CS). Jumper settings on both drives should be set to CS. Otherwise, the drive you’re plugging into should be set to Master and your drive to Slave.
(Check the hard drive manufacturers website for the correct jumper settings for each drive, the image below is an example specifically for this article)
As above, power down, unplug and open up the computer you’re going to hook your drive to, plug in the appropriate cables, put everything back together and fire it up. There’s no need to replace the side of the computer you’re using, unless it makes the other computer owner feel better, than by all means.
Failing hard drives may have corrupted system files or may not have enough juice to fire up the entire computer, but even slightly damaged drives will register with the other machine, and that’s when you can navigate to the folders where all your stuff resides.
Your drive will show up as E: or F:, depending on that computers set up, it could be anything except C: or D: (in most cases).
Once you find your drive go to – E: (whatever drive letter it is)>Documents and Settings>Owner (or whatever your user name is)>My Documents. That is the default location for personal data storage, although you may have files on your desktop or other folders you created as well.
Once you have that figured out, start moving your data over. You can use your friends hard drive, an external drive, a thumb drive or you can burn the files onto a DVD or BluRay disk.
What If…
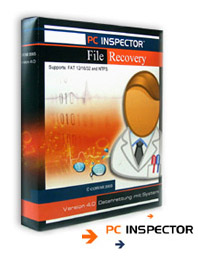 If the drive registers but doesn’t allow access the drive may be damaged. In that case, you’ve got a couple options. The FREE option is to download and install PC Inspector – File Recovery.
PC Inspector is a FREE data recovery program that can not only pull data from a damaged drive, but it also has the ability to retrieve deleted files on your computer. As mentioned above, when you delete a file it just gets moved to another area and is overwritten. If the file was deleted recently or not much activity has taken place, there’s an excellent chance that you can completely restore the file. PC Inspector – File Recovery is awesome.
PC Inspector also has a SmartCard Recovery program that performs the same function for the SmartCards used in digital cameras and other 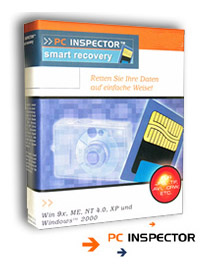 devices. Digital cameras have been known to re-format a SmartCard for no reason at all, but when that happens you just need to download and install PC Inspector Smart Recovery. Plug a card reader into your computer, or use the card reader bay, start Smart Recovery, navigate to the card and your pictures magically reappear. Again an awesome program.
If All Else Fails
If that doesn’t work, there is one more option you can utilize that isn’t free, but it doesn’t cost hundreds either. The absolute best data recovery, hard drive repair program is called SpinRite.
For a mere $89 (as of this writing) you can save data and repair hard drives over and over again. I’ve used SpinRite on dozens of drives and have had 100% success in restoring them. SpinRite will restore corrupted system files, boot sectors and it can even repair physically damaged drives. Absolutely amazing.
Summary
If you’re cheap (or broke) like me, you may go through the steps above to retrieve your data. If you’re not interested in cracking open your computer, than SpinRite is definitely the best way to go. Please leave any questions in the comments section.
Good Luck!

so thanks for your teaching
i used form your photos very much